Guide: Setting Up a Website in 5 Steps
The guide is a short, 5-step process. It helps you set up your website from scratch and navigate its various sections. Each step answers a single question. Everything you choose is saved immediately.
Who is this suitable for?
For those who have just created a website. Or for those who want to quickly change the mode, homepage, menu pages, and branding without having to search through the settings.
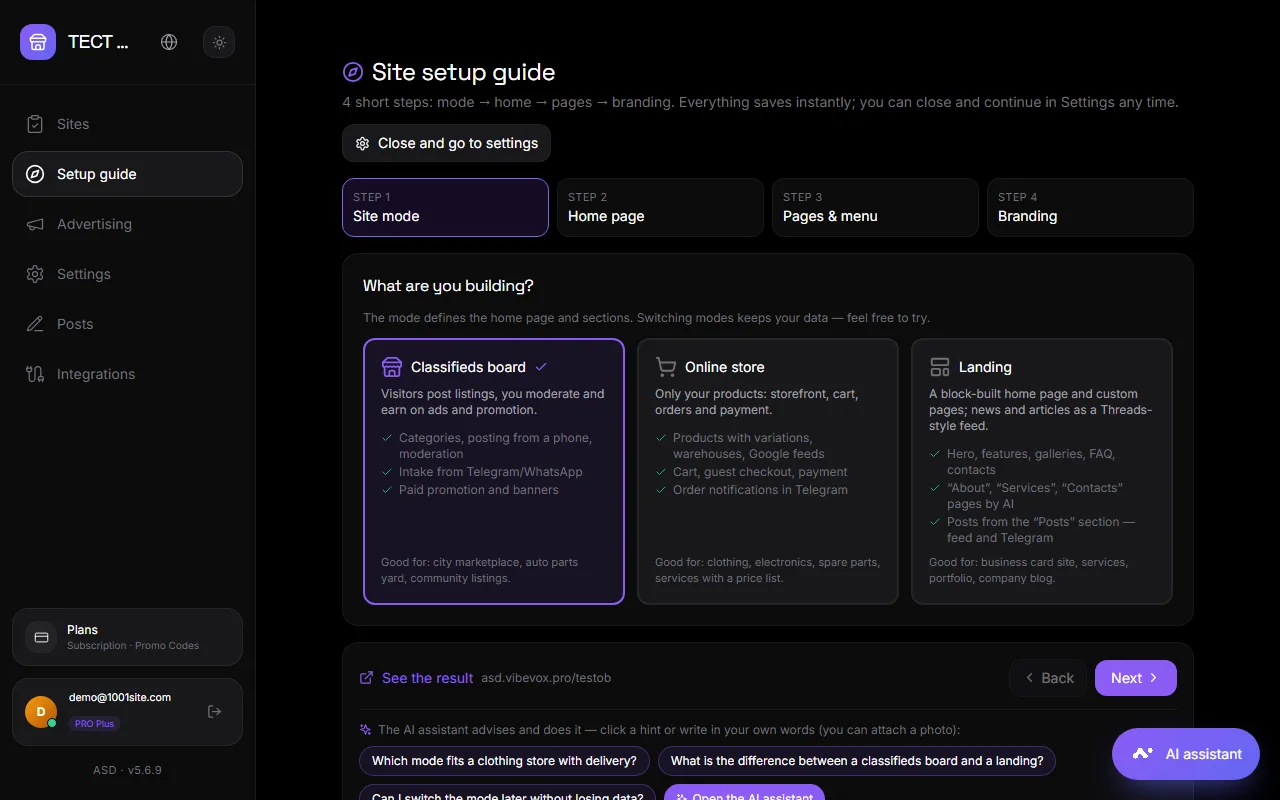
How to open the guide#
There are four ways:
- The new site opens directly to the guidebook after registration.
- On the main page of your account, there's a card called "Set up your website in 5 steps." It's visible until you complete the guide. Afterward, a short link appears: "Guide completed — open again."
- In the account menu on the left there is an item called “Guide”.
- In the "Settings" section at the top, there's a link that says "Not sure where to start? Guide."
Your progress is saved in your browser. If you close the guide at step 2, it will open at step 2 next time.
What is there at every step?#
At the bottom of each step are the same elements:
- The "See what you've got" link opens your site in a new tab. Changes are visible immediately.
- The "Back" and "Next" buttons. The final step is the "Done - Go to your account" button.
- The AI assistant will suggest suggestions for this step. Click on a suggestion to open a chat with the prepared text. You can edit the text or send it as is. You can attach a photo to the message.
- The "Open AI Assistant" button is a chat without pre-written text.
The "Close and go to settings" button at the top takes you to the full "Settings" section. It has all the same features and much more.
Steps#
Step 1. Site mode#
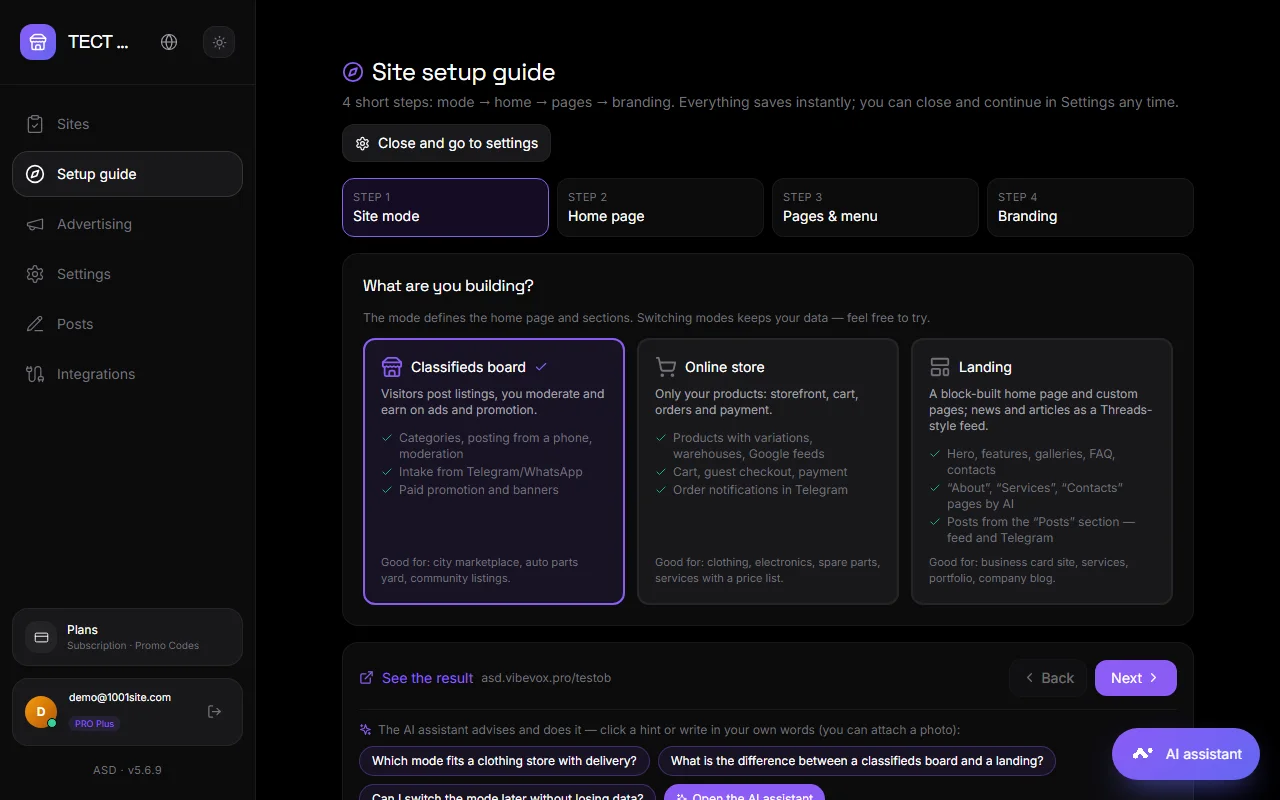
Answer the question "What are you building?" There are three cards:
| Mode | What is this | Fits |
|---|---|---|
| Bulletin board | Ads are submitted by visitors. You moderate them and earn money from advertising and promotion. | City flea market, auto dismantling, community announcements |
| Online store | Only your products: showcase, shopping cart, orders and payment. | A store selling clothing, appliances, spare parts, and services with a price list |
| Landing | A homepage made up of blocks and its own pages. News and articles are displayed in a feed, like in Threads. | Business card website, services, portfolio, company blog |
Each card describes what you'll receive and who it's suitable for. Click on the card, and the mode will be saved immediately. Data is not lost when changing modes. Learn more: Classifieds, Online Store, Landing Page.
Step 2. Home#
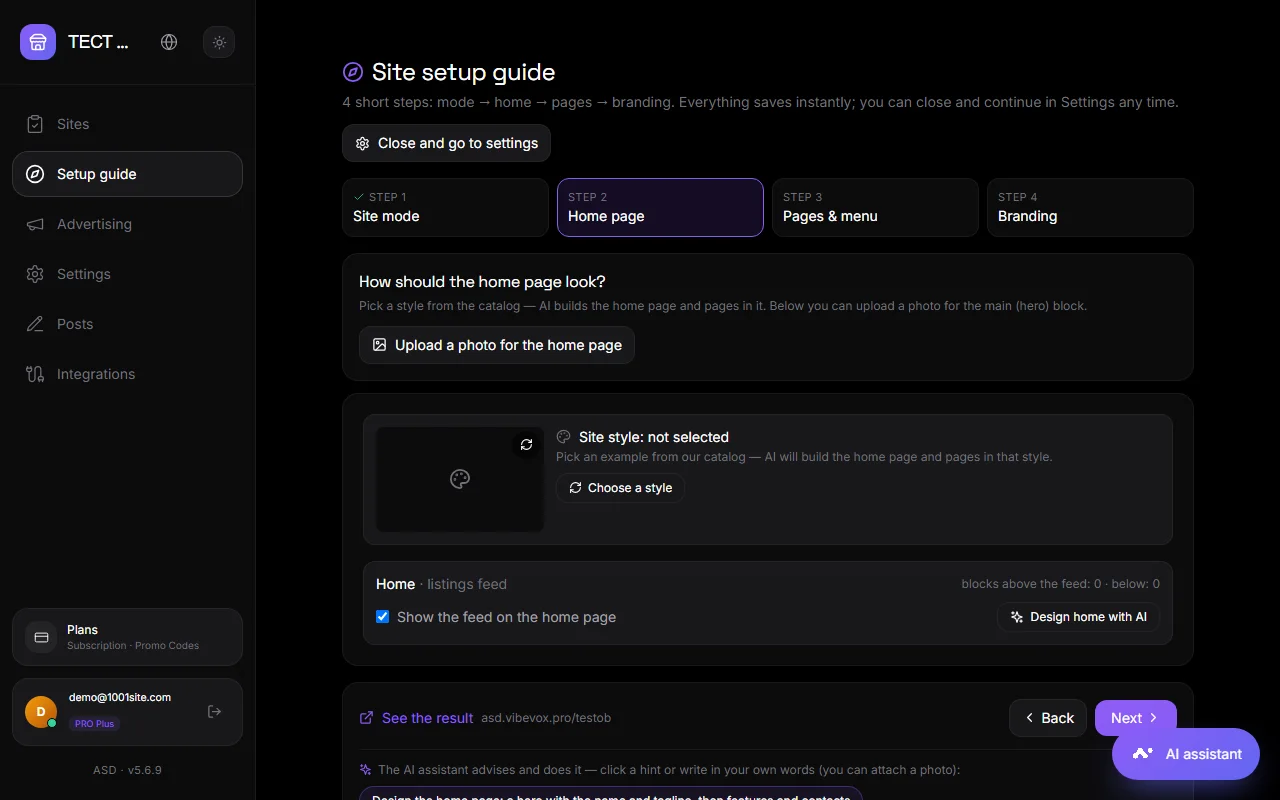
In this step, you decide what the main page will look like:
- Upload a photo for your homepage. Select the file. The photo will be uploaded to the website, and the AI assistant will open with a pre-defined command: create a hero block with this photo, title, and tagline. Click "Submit."
- Website Style. Click "Select Style" (or "Select Other"). A catalog of 1,000 examples of the world's best websites will open. Find an example by name, color, or category, open its page, and click "Apply Style." The site's theme, fonts, and animations will be instantly changed, and the AI will create a homepage and pages based on this reference. Learn more: Catalog Styles.
- Show feed on homepage. If unchecked, only the ads and product feeds will remain on the homepage. The ad or product feed will be accessible through search and categories.
- Design your homepage with AI. Opens an assistant with the command to add a hero section, benefits, and contact information in the website's style.
Step 3. Filling#
This is where you fill the site with content. There are two options, as in the "Create a Site" window on 1001site.com:
- Take it from Instagram, TikTok, Facebook, or an old website. Paste a link to a profile, post, video, or website and click "Insert." The AI will scan the page in a minute and show you what it found: the title, logo, and favicon, description, contact information, social media links, and product listings with prices. It will also suggest pages for the website. Check the boxes next to what you want to add to the website and click "Apply." The title, slogan, "About Us" text, logo, favicon, and contact button will appear immediately. The products will be uploaded to the catalog with categories and photos. The AI will rewrite the block texts to suit your business and create missing pages—this process takes one to three minutes, and the progress is visible on the same screen. If you already provided a link when ordering a website from 1001site.com, the step will remind you of this and show whether the products have been uploaded. Learn more: Transferring products by link.
- I'll fill it out myself. Click "Tell the AI assistant" and describe your business in your own words: what you sell, who you serve, your city, and your contact information. The assistant will write the text, add your contacts, and create pages. You can attach a photo to your message.
The content provided via the link is available on the "All Inclusive" plan. Products from other websites will appear in the catalog with their own prices—check the currency and prices after uploading.
Step 4. Pages and menus#
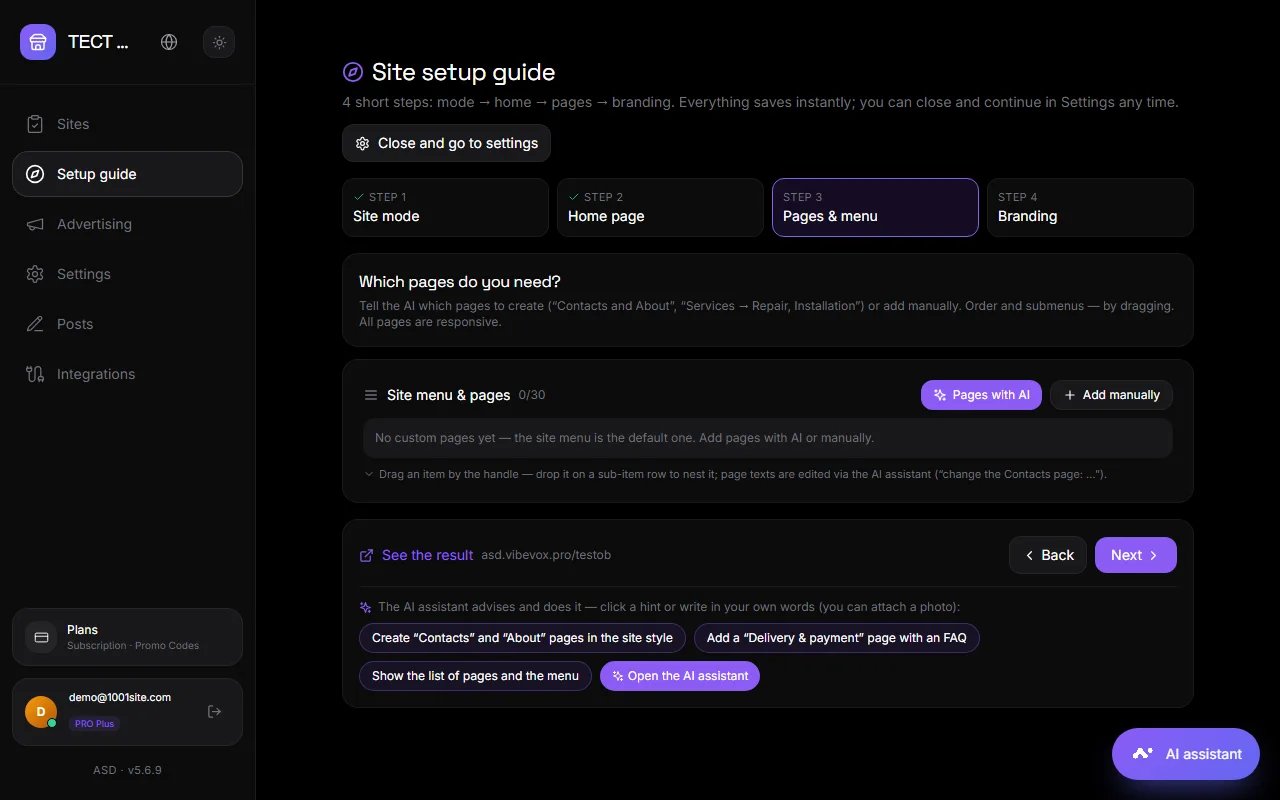
Here you create website pages and set up menus:
- AI-powered pages. Specify the pages you need, such as "Contacts" and "About Us." The AI will create pages in the same style as your website and add them to the menu. The pages are responsive from the start: they look great on phones, tablets, and computers.
- Add manually. Enter the page title. If you write what should be on the page, the AI will create it. If you leave it blank, a template will be created.
- Order and submenus. Drag an item by the handle on the left. Drop it on the sub-item row to nest it. The arrow buttons do the same.
- Show in menu and published - two switches for each page.
- Default – returns the homepage and menu to their default appearance. Pages are not deleted; they are archived.
More details: Home page and site menu.
Step 5. Branding#
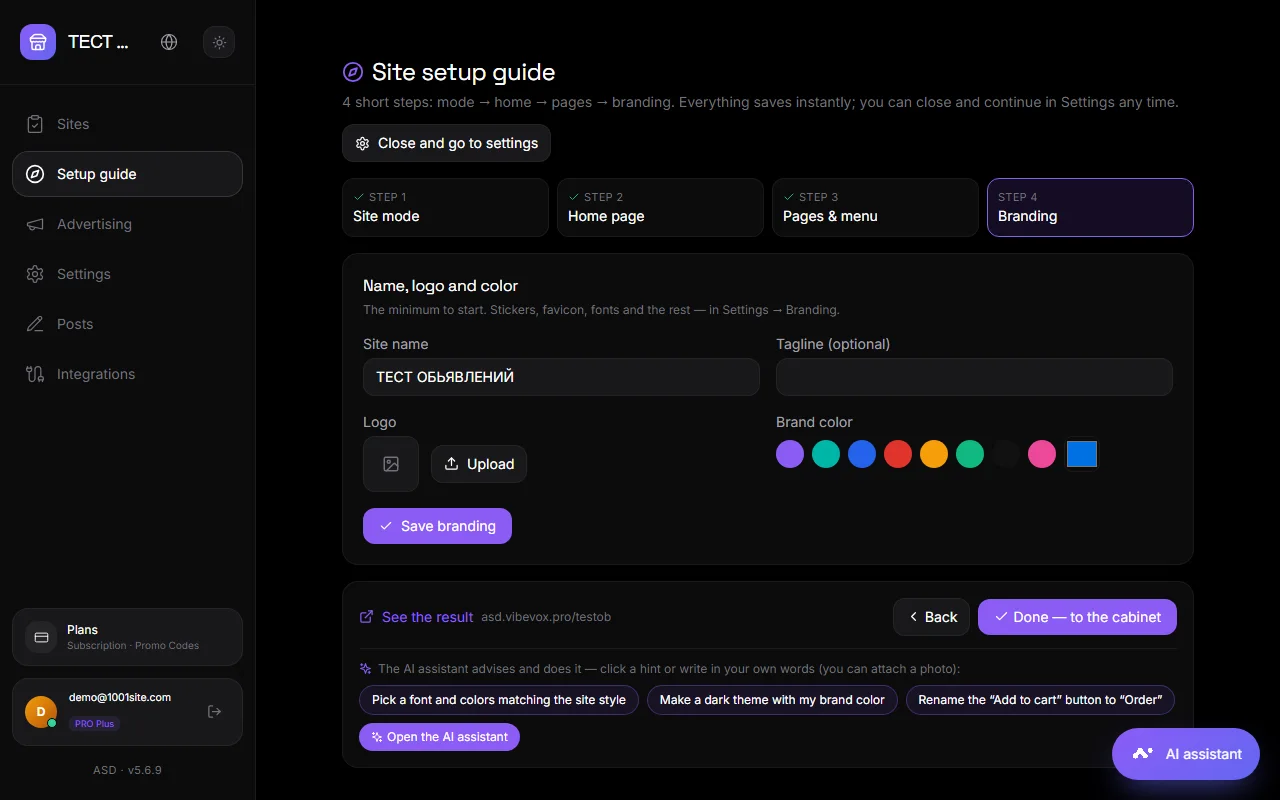
The minimum to get started (if you took the data from the link in the "Filling" step, the name, slogan, and logo are already filled in—you can edit them here):
- Site name - displayed in the site header, in the browser tab, and when forwarding a link.
- A tagline is a short line below the title. Optional.
- Logo – Upload an image. A PNG with a transparent background is best.
- Corporate color - choose from ready-made ones or set your own.
Click "Save Branding." The rest—favicon, stickers, fonts, currency, and language—can be found in "Settings → Branding." Learn more: Branding.
What to do after the guide#
- Click "Done - go to your account".
- Open the website using the link in the header of your account and check how it looks on your phone.
- Add products or ads: Ads and products.
- Connect to receive ads from messengers: Telegram, WhatsApp.
- Connect your domain: Your domain and SSL.
Questions and answers#
Is it possible to skip a step?#
Yes. Click "Next" or go directly to the step you need at the top. You can go through the steps in any order and return to them later.
I closed the guide. How do I open it again?#
In the left-hand menu of your account, click "Guide." Or, on the main page of your account, click the link "Guide completed - open again."
AI hints aren't working. Why?#
The AI assistant is available on plans with AI. On other plans, the assistant button indicates which plan is needed. Everything else in the guidebook works without AI: mode, style, manual pages, and branding.
Are changes saved without the Save button?#
Yes, except for the "Branding" step. The mode, style, pages, and menu are saved immediately. In the "Branding" step, click "Save Branding."